Little Helper

If you have read one of my previous blog posts about building a custom Teensy you already know I have been working on a device based on the Teensy design.

Working in my lab with electronics I came across different little challenges once in a while, and noticed that I am missing tools to handle them efficiently. Just a quick list, I am sure you could add various items to the list:

  • What is the I2C address of a chip? (yeah, you can work through the Datasheet but the Datasheets I know don’t have an outline topic for this. It’s somewhere hidden deep in text somewhere)
  • What is the voltage range of the analog sensor in my current environment (take a photo sensor)?
  • Generating PWM or DAC signals
  • Does this circuit do anything?
  • Does this circuit do anything specific?
  • Reading serial output of your Microcontroller/Arduino project

Of course these aren’t any issues that you could not handle with the tools you have. But each of these take time. Checking an IC for it’s I2C address is easy: Connect it to your Arduino Uno, firing up the I2C Scanner sketch and you are good to go. That is 10 minutes minimum finding your Uno, wiring it up, firing Arduino IDE, uploading the sketch. And everything while your workspace is full of components, wires and stuff for the actual project you are working on.

I had been working on wireless sensors for a while that should take the least amount of power possible. You cannot add status LEDs as they draw way too much power. I had those PCBs lying around and had no clue if they do anything. I had to carry my laptop around, connecting it to the PCB to read the serial port to see what it does.

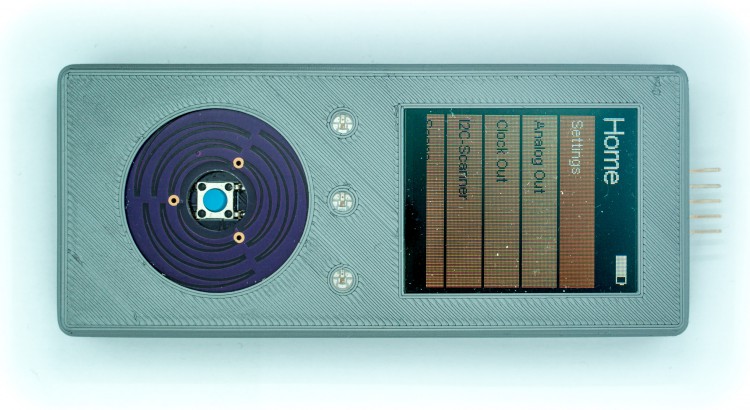
Why, the heck did I learn all that programming and electronics stuff and not using it to solve that issue. I thought of a small, portable device featuring some ports to connect stuff like sensors and other circuits and some menu driven user interface to trigger various modules doing tests, reading data, you get it.

(more…)

Read More

Custom LCD Controller for Printrbot Simple (Metal)

In order to print with the Printrbot Simple Metal you have to connect your computer with your printer via USB and make sure that the computer continuously sends data to the printer. If your computer crashes, your printer stops and your maybe long hour print is a piece of chunk. If your computer goes into stand by the result is the same. And there are various other reasons like energy consumption. The way to go is untethered printing.

The Printrbot Simple Metal is capable of that in two ways, both of them require a Mini-SD card inserted into the printer. The first way is to write the G-Codes generated by your Slicer, typically Repetier Host and Slicr to the SD-Card. Name it auto0.gcode, insert the card into the printer. Shut it down and on again. The printer should now start to print. But you will not know if it works for a couple of minutes as it’s first heating up. Nothing moves, etc. I tried that a couple of times and found the procedure to be very annoying.

The second method is using the Addon LCD Controller sold by Printrbot.

Getting your hands on a LCD Controller

Your Printrbot is already capable of displaying a nice LCD-Menu with all kinds of options and the option to browse the SD-card and run any print from it untethered from your PC. All that is needed is a Standard 20×4 LCD Display and a rotary encoder. A rotary encoder is a special kind of input sensor that sends signals when it is rotated.

Printrbot sells these LCDs for $65 in their store. But they still have that wood look. It does not match the Metals Design. And, as I am living in Germany you will have to wait a few days for it to arrive and you will likely have some issues regarding customs. I did not found a german distributor a few weeks ago so I wanted to built my own. A few days ago I have found 3ddinge.de selling the LCD Controller in Germany for €70. That’s a lot of money and by doing it yourself you will end up with 30-40 Euros for the LCD Controller.

(more…)

Read More