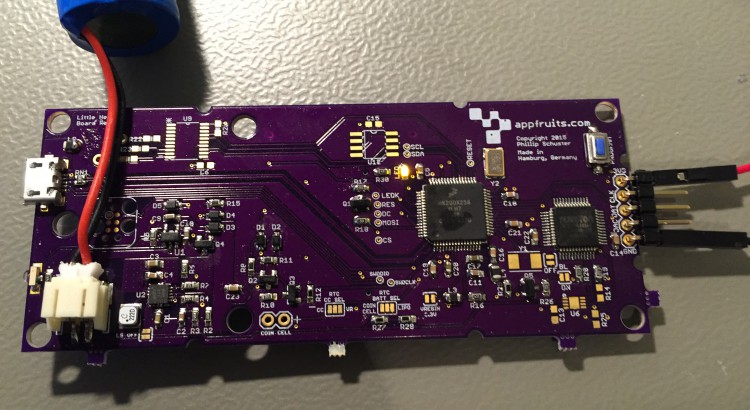
Little Helper

If you have read one of my previous blog posts about building a custom Teensy you already know I have been working on a device based on the Teensy design.

Working in my lab with electronics I came across different little challenges once in a while, and noticed that I am missing tools to handle them efficiently. Just a quick list, I am sure you could add various items to the list:

  • What is the I2C address of a chip? (yeah, you can work through the Datasheet but the Datasheets I know don’t have an outline topic for this. It’s somewhere hidden deep in text somewhere)
  • What is the voltage range of the analog sensor in my current environment (take a photo sensor)?
  • Generating PWM or DAC signals
  • Does this circuit do anything?
  • Does this circuit do anything specific?
  • Reading serial output of your Microcontroller/Arduino project

Of course these aren’t any issues that you could not handle with the tools you have. But each of these take time. Checking an IC for it’s I2C address is easy: Connect it to your Arduino Uno, firing up the I2C Scanner sketch and you are good to go. That is 10 minutes minimum finding your Uno, wiring it up, firing Arduino IDE, uploading the sketch. And everything while your workspace is full of components, wires and stuff for the actual project you are working on.

I had been working on wireless sensors for a while that should take the least amount of power possible. You cannot add status LEDs as they draw way too much power. I had those PCBs lying around and had no clue if they do anything. I had to carry my laptop around, connecting it to the PCB to read the serial port to see what it does.

Why, the heck did I learn all that programming and electronics stuff and not using it to solve that issue. I thought of a small, portable device featuring some ports to connect stuff like sensors and other circuits and some menu driven user interface to trigger various modules doing tests, reading data, you get it.

(more…)

Read More

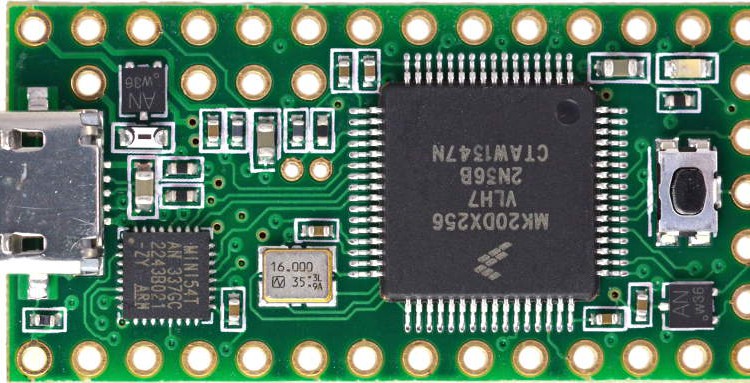
Building your own custom Teensy

UPDATE (November 24, 2016):

While this blog post still is very popular, it’s a bit old now. It still uses the old Teensy bootloader chip that is meanwhile deprecated and is not available anymore in larger quantities. However, I have been part of the dev team of the new Printrbot Simple 2016 and I have developed the display component which also uses the Teensy. Printrbot made everything open source.

If you are interested in building your own Teensy hardware, have a look in my Behind the scenes report and the Hardware explained report which makes the schematics and PCB available for download. This new PCB features the latest Teensy bootloader chip.

Although the bootloader chip is old that is described here, everything else like routing USB traces is not! Have fun reading it and let me know what you think!

UPDATE (December 15, 2015):

As you are reading this you might be interested in my custom built Teensy project named Little Helper. I made it Open Source under the MIT license including Schematics, Layout, BOM, 3D models of enclosing, and the complete Source Code. Have a look: Appfruits LittleHelper.

UPDATE (June 26, 2015):

Due to popular demand I have created a “reference board layout” and the schematics in EAGLE CAD (7.2) format. I created it by removing all components that were specific to my project. I just left in the Teensy part, the USB-port and a 3.3V regulator and rearranged the components so they fit in a small footprint. I have never produced the board but it should work (also it doesn’t do anything useful) as the components and layout have been working flawlessly in my own application.

This should speed up your development time for your own project. The board layout contains a switching regulator for the 3.3V which might be overkill if you are running your board of an USB-port as the provided regulator is mainly used with LIPO battery based projects and is hard to hand solder (I use a reflow oven which works quite well with QFNs). Use a simple LDO if you are just running your board with USB power. I have left the board layout for the switching regulator as it has been quite hard to get a good board layout with nearly no noise (switching regulators tend to be very noisy due to it’s nature) and should get you up and running quickly if you intent to do a LIPO-based project (of course you will need to add a LIPO charging circuit which can be found for example in Sparkfuns Power Cell product (see board and schematics for details).

All parts have an attribute named MPN for Manufacturer Part Number and MF for manufacturer. This way you can just use EAGLEs BOM-ULP script to export a BOM that you can directly upload to Mouser of DigiKey to get your parts.

Please note: Don’t order the MINI54TAN at DigiKey or Mouser. You will need to order the MINI54TAN at PJRC.com as this IC contains the core Teensy functionality!

You can find the EAGLE board layout and schematics in our Github repository: Custom Teensy 3.1 board layout and schematics. Please make sure to read this blog post before using parts or the whole “reference board” in your own project as there are quite a few things to consider which is largely documented and described below.


If you are reading my blog you might know that I really love Teensy. Teensy is an ARM powered very little Arduino compatible development board. It does one thing so damn good and I think that is very important for a development board and one of the keys to the success of Arduino: Easy programming. You do not need to connect wires and fancy boxes (JTAG programmers), just connect with USB and click on the program button.

But I am not a big fan of using development boards within final products. Although Teensy is really small it’s too high to pack two PCBs together. Using headers for easier soldering and it gets worse. If you really want to build small products you will often have to build your own PCB. Paul Stoffregen, the creator of Teensy enables these efforts by providing the bootloader MCU in his own store. They are very professionell. I had a few issues with german customs and they immediately sent out new ones and I received a refund for the first package that did not make it through.

Of course it’s not Pauls business model to help you out building your own Teensy, although he was very helpful in the forum. You will have to rely on the great Teensy community or blog posts like this one.

As I had a bit of trouble to get my custom Teensy board up and running I will try to give you some advice on how to build your own. (more…)

Read More
Teensy – Arduino on Steroids

I love the Arduino Eco-System. Although I do not really like the IDE, the whole system is awesome. And it allows to quickly prototype ideas. And, as everything is Open Hardware, it also allows you to build your own PCBs with the same components used by Arduino. I am not in the business for creating a large-scale electronics product. But it’s very important for me that I could.

While working on my DIY Home Automation System I noticed some limitations with the current Arduino Hardware Offers. I have created my own Atmel 328p based PCB for my sensor nodes. The Atmel 328p is the MCU that drives Arduino Uno, Nano, Micro Pro, Sparkfuns Redboard and various other Prototype Systems. This MCU is quite fast (up to 20 MHz), can be run on batteries for a long time (if you care about your current consumption) and is easy to use program with the Arduino IDE. But there are limitations. You only get about 2K SRAM and 32K of program memory. That is enough for devices that only connect to a few sensors, driving a few motors, etc. But it’s not enough for more complex projects.

My DIY Home Automation Network needs a hub, that acts as a bridge between the Internet and the sensor nodes. Sensor Nodes are using nRF24L01+ Radio Modules. The Hub also hosts such a radio module, but has to send the signals in to the cloud. Although I wanted to have nice devices in the end I tried an Arduino Yun as a hub. The hub does not have to be very pretty as it will be placed in a small room that is not exposed. A small enclosure will do it. Arduino Yun is a great device that hosts both an Arduino MCU and a full-fledged Linux on the same device, connected with a bridge. Using the bridge you can run shell commands from the Arduino MCU on the Linux side and receive the results. You do not have to build a whole HTTP-client, as Linux already has one. I have written a small tutorial about that: Running Node.js on Arduino Yun.

All of that worked fine – in the lab. Using the sensor networks in the wild (well, in my house), I found it very difficult to debug the system. In order to save power the nodes do not have any LEDs, Display, whatever. I added some LEDs to the Arduino Yun that showed it’s state and if sensor data came in. But all in all it did not really help. I found sensor data in the cloud, but not from all nodes. And I could not really see the routing in the nRF24L01+ network. Attaching displays to the sensor nodes has not been an option due to power restrictions. I had to add a display to the hub. That would give me the option of adding some sort of user interface to it. But Arduino Yun only has 2K SRAM, and adding a display and it’s quite large driver code I ended up with not enough SRAM left. I could optimize everything so it perhaps would fit, but I would not have any room to add a UI to the hub later on. I have been quite disappointed about this limitation. I think the Yun should have built with a beefier Arduino-MCU. It should be possible to drive a display trough the bridge from the Linux side, but that would be way to slow. Although I really liked the idea of the Yun, it did not fit my needs.

Teensy is here to help

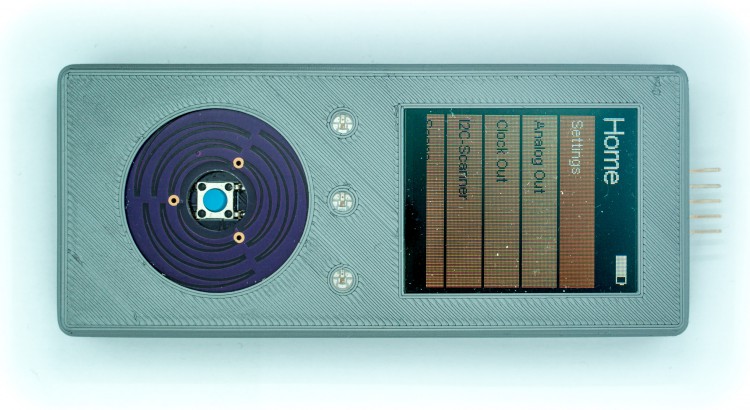
Searching for an Arduino Compatible small device Google with tell you to have a closer look at: Teensy. Teensy is just an amazing piece of hardware, created by Paul J Stoffregen. Paul did an amazing job with Teensy, especially the latest version 3.1. Teensy ist very small. If you find an Arduino Nano or Micro Pro small, you will be amazed how small Teensy really is. And it’s very, very powerful. Teensy features an ARM Cortext MPU with 64 KB SRAM and 256 KB Program memory. That is a lot of space and enough to do a lot of cool stuff. What I really love about the Teensy is how bootloading it is solved. I had a few issues with programming Arduinos. Teensy features a tiny uploader software, that is either triggered by the Arduino IDE or by pressing the reset button on the device. And uploading new code always worked. I really love that. Just install the Teensy Hardware Plugin in your Arduino IDE 1.0.x (it does not support 1.5.x at the moment) and you are good to go.

(more…)

Read More